How to switch from 32-bit Xeams to 64-bit
This page goes over the process of converting your existing Xeams from 32-bit to 64-bit. With this process, you don't need to uninstall. Your current configuration settings and emails will remain intact.Before following the instructions, confirm if Xeams is running on 32-bit or 64-bit.
To confirm if Xeams is running on 32-bit, follow the instructions below:
- Log into the web interface of Xeams as admin.
- Hover over Tools, then click on About Xeams.
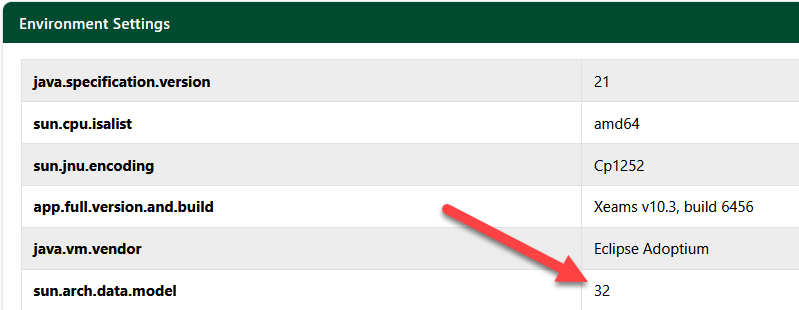
- At the bottom, you will see the Environment Settings. Search for sun.arch.data.model. If you are running 32-bit, the value will be displayed as 32, as shown below:
Part 1
This part goes over uninstalling the service and replacing the necessary Java files:- Stop the Xeams service through the services page in Control Panel.
- Open Command Prompt as Administrator. Go to the directory where Xeams is installed.
For example, if your Xeams is installed on C:\Xeams, then run the following command:
cd C:\Xeams - Next, run the following command:
InstallService.exe -UninstallService
Leave this command prompt open, as you'll need it in part 2. - In your Xeams installation directory, you should see a folder named jre. Rename this folder to jreold.
- Download JRE 21 Temurin from this link.
- Extract the zip file you downloaded from Adoptium. You should now have a folder named something like jdk-21.0.xx. Rename this folder to jre, then move this folder to the installation directory of your Xeams. Inside the jre folder, you should see folders such as bin, conf, legal, lib, and a few files.
Part 2
This part goes over replacing and adding certain files and reinstalling the service:- Download the stock files from here.
- Extract the ZIP file. You will need to move the following files to your Xeams installation directory (replace the files):
- InstallService.exe
- InstallService.lax
- lax.jar
- Xeams.exe
- Download lib4njre.jar here. Next, put this file inside the lib folder.
- Open the command prompt you had from part 1, then run the following command:
InstallService.exe -installService - This should start the service. Once it's up, log into the Xeams web interface and go back to About Xeams.
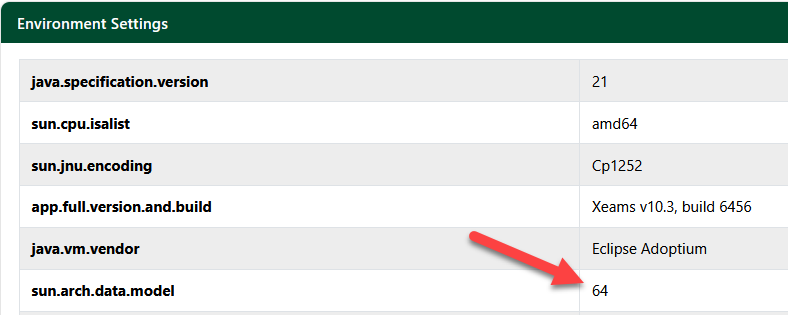
You should now see the value for sun.arch.data.model to 64 as shown below: