Configuring Xeams with eM Client for Reading and Sending Emails
This page explains how to configure eM Client, a commercial email client, with Xeams to send and receive emails.
Prerequisites
- You must have installed Xeams in either Stand-Alone or Hybrid mode.
- Create at least one user account. Go to Server Configuration > Manage Users to create user accounts.
- You must configure either POP3 or IMAP, or both, in Xeams. Click the "gear" icon for the POP3 or IMAP Server Status box on the home page to configure these servers.
- Create an SSL certificate for your Xeams to ensure encrypted communication between Xeams and eM Client. Click Server Configuration > Manage SSL Certificate to create a free SSL certificate.
Assumption
This article makes the following assumptions about your environment.
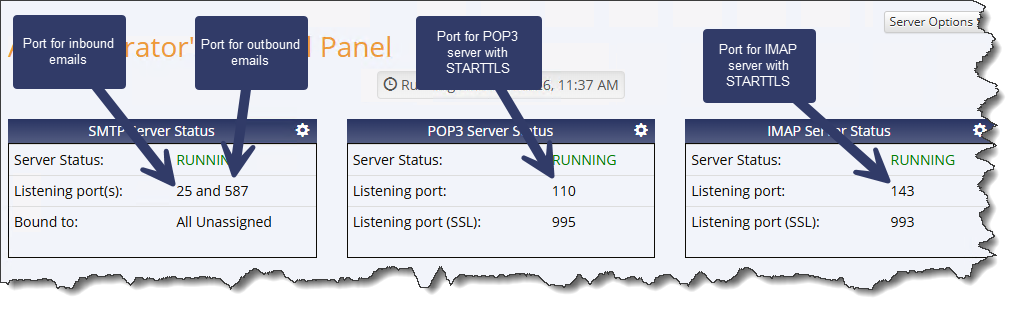
- You have enabled the IMAP server in Xeams, which listens on TCP/IP port 143 to fetch emails from your Inbox.
- You have enabled port 587 under Server Configuration > SMTP Configuration to receive outbound emails.
- STARTTLS is enabled, meaning you have configured Xeams to use an SSL certificate and have enabled STARTTLS for IMAP and SMTP.
- You have a valid SSL certificate from Let's Encrypt.
- The fully qualified hostname of your Xeams server is mail.myserver.com. Replace this with the actual value.
- You're configuring a user that is identified by john.doe@mycompany.com. Replace this with the actual value.
- You have configured the firewall at the edge of your network to allow Internet traffic to the machine running Xeams on the necessary ports.
- You have downloaded and installed eM Client. Xeams works with every edition of eM Client (Free, Personal & Business).
Once configured, the Home page in Xeams should look like the screen below.
Configuration Steps
- Open eM Client
- Click the hamburger icon in the upper-left corner to open the pop-up menu, then click Accounts.
- Click the Add Account button at the top.
- There are two options for creating an account:
- Automatic Setup - in this case, enter your email address, and eM Client will try to determine the connection parameters. Refer to this page for more information on this method.
- Manual Setup - this method gives you more control when specifying the configuration parameters. The following steps assume you are using this method.
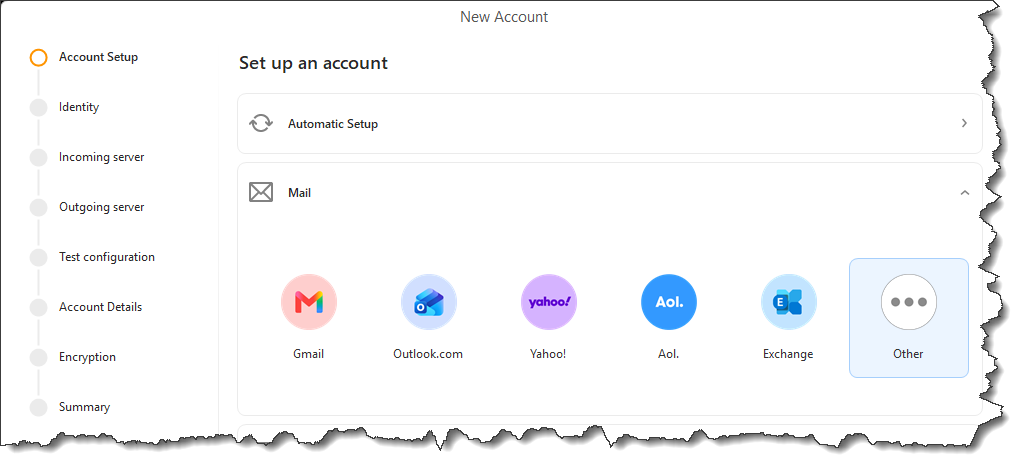
- Select the "Mail" panel and click "Other", as shown below.
- On the following page, specify your email address